Common EA Trading Strategies
Hedging EAs: Understanding Risk And Protection Strategies In Forex Trading
Hedging EAs: Understanding Risk And Protection Strategies In Forex Trading
Hedging EAs in Forex trading present automated strategies for potential risk management, yet a thorough understanding of their operational complexities and inherent dangers is absolutely essential before considering their use. Many traders, particularly those with demanding careers, are drawn to the allure of automated solutions, hoping to navigate the volatile currency markets more effectively. But can these Expert Advisors truly shield your capital, or do they introduce a different set of challenges?
The foreign exchange market, known for its liquidity and 24/7 nature, also carries substantial risk. Traders constantly seek tools and techniques to mitigate potential losses while aiming for consistent returns. One such tool is the Hedging Expert Advisor (EA), a piece of software designed to automate hedging strategies. This article delves into the world of Forex Hedging EAs, exploring what they are, how they function, the common strategies they employ, and critically, the potential risks involved. Our goal is to provide you with comprehensive knowledge, helping you grasp the realities of these automated systems and avoid false expectations, particularly concerning profit generation and capital safety.
Key Insights About Hedging EAs
Before we dive deeper, here’s a quick summary of what you need to know about Hedging Expert Advisors:
- Risk Mitigation, Not Elimination: Hedging EAs aim to offset potential losses on existing trades by opening counter-positions, but they do not eliminate trading risk.
- Automation of Strategies: They automate various hedging techniques, such as direct hedging or currency correlation hedging.
- Complexity in Management: While automated, effectively managing a hedged position, especially the unhedging process, can be complex and requires understanding.
- Cost Implications: Hedging can incur costs like swaps (overnight fees) and wider spreads, which can erode profits or increase losses.
- Not a Guaranteed Profit Tool: Hedging EAs are primarily risk management tools. Profitability is not assured and often depends on sophisticated unhedging logic or, unfortunately, risky underlying strategies in some EAs.
- Broker Permissibility: Not all brokers allow hedging, and specific rules (like FIFO in the U.S.) may impact how hedging EAs can operate.
- Due Diligence is Crucial: Understanding the specific strategy, settings, and risks of any Hedging EA is vital before use.
What Exactly is a Hedging EA?
Navigating the Forex market involves managing uncertainty. For traders seeking automated assistance in this endeavor, understanding tools like the Hedging EA is a critical first step. These are specialized software designed to implement hedging strategies automatically within trading platforms.
Defining a Hedging Expert Advisor
A Hedging Expert Advisor (EA) is a type of automated trading software used in the Forex market that automatically opens an opposing or counter-trade to an existing position. Its primary purpose is to protect an open trade from further adverse price movements, essentially creating a temporary “pause” in profit or loss fluctuations for that specific position. A Forex Hedging EA operates based on pre-programmed rules and algorithms set by the developer or user.
These EAs are typically built for platforms like MetaTrader 4 (MT4) or MetaTrader 5 (MT5). The “hedging” part refers to the strategy of taking an opposite position in the same or a related financial instrument to reduce the risk of loss from price fluctuations. The “Expert Advisor” part signifies its automated nature, executing trades without manual intervention once configured. It’s crucial to differentiate a Hedging EA from a standard trading robot; while both automate trades, a Hedging EA’s core function revolves around this specific risk management technique of opening counter-positions.
How Does Automated Hedging Fundamentally Work?
Automated hedging through an EA fundamentally works by identifying a condition to trigger a hedge (e.g., a certain amount of floating loss) and then executing an opposing trade. If you have a buy order, the EA will place a sell order for the same instrument and typically for the same volume, or vice versa. This action doesn’t close the original trade but neutralizes its exposure.
The rationale behind this is to temporarily cap the potential loss on the initial trade. For instance, if you bought EUR/USD and the price starts to fall significantly, a Hedging EA might automatically sell EUR/USD. Now, for every pip the original buy trade loses, the new sell trade gains, effectively freezing the loss (minus spread and swap costs). The trader or the EA’s subsequent logic must then decide when and how to close one or both positions. This process of automated hedging relies on the EA’s ability to monitor the market and existing positions, then execute trades swiftly based on its programmed parameters. This expert advisor for hedging then continues to monitor the situation for opportunities to unwind the hedge, ideally at a more favorable market condition.
Key Differences: Hedging EA vs. Manual Hedging
While manual hedging involves a trader personally opening counter-positions, a Hedging EA automates this process. The primary advantage of a Hedging EA is speed and consistency; it can react to market movements and execute hedges faster than a human, 24/7, without emotional interference. This is especially useful in volatile markets.
However, the reliance on pre-programmed logic is also a potential drawback. An EA will only do what it’s told. If its logic is flawed or market conditions change drastically beyond its design parameters, it can lead to undesirable outcomes. Manual hedging allows for more nuanced decision-making based on real-time analysis and changing fundamentals, but it’s time-consuming and prone to human error or emotional decisions. Furthermore, setting up and understanding the parameters of even the best hedging expert advisor requires a learning curve.
Core Hedging Strategies Employed by EAs
Hedging Expert Advisors can employ various strategies to protect capital. Understanding these core approaches is vital for anyone considering these tools, as each has its own mechanics, benefits, and, importantly, risks. These automated hedging strategies can range from simple direct hedges to more complex correlation-based approaches.
What is Direct Hedging in Forex?
Direct hedging in Forex involves opening a position that is a direct opposite to an existing one on the same currency pair. For example, if you have an open buy trade on EUR/USD, a direct hedge would be to open a sell trade on EUR/USD, usually for the same trade volume. This effectively locks in the current floating profit or loss.
The primary purpose of direct hedging is to neutralize an open position’s exposure to market fluctuations without actually closing the trade. This might be done if a trader anticipates short-term volatility against their position but believes their long-term outlook remains valid. However, traders must be aware of costs. While a perfectly hedged position (equal buy and sell volumes on the same pair) won’t change in its net profit/loss due to price movement, it will typically incur swap or rollover fees for holding positions overnight. Some brokers may also have wider spreads, which impact the cost of opening and closing these positions. Critically, regulations in some jurisdictions, like the FIFO (First-In, First-Out) rule enforced by the Commodity Futures Trading Commission (CFTC) in the United States, restrict direct hedging on the same pair in the same account. According to the CFTC, “A GIB [Guaranteed Introducing Broker], FCM [Futures Commission Merchant], or RFED [Retail Foreign Exchange Dealer] must offset positions in a customer account in accordance with the first-in, first-out accounting NFA Compliance Rule 2-43(b)” (Source: National Futures Association, NFA Manual – NFA Compliance Rule 2-43(b)). This means brokers adhering to this rule will close the oldest trade first when an offsetting trade is made, effectively preventing a direct hedge from being maintained.
How Does Correlation Hedging Work with EAs?
Correlation hedging works by taking positions in two or more different currency pairs that have a known statistical relationship (correlation). An EA utilizing this strategy would open trades on these correlated pairs in a way that aims to offset potential losses. For instance, if a trader is long AUD/USD and fears a downturn, a correlation hedging EA might simultaneously short NZD/USD if these pairs have a strong positive correlation.
Currency pairs can be positively correlated (tend to move in the same direction, like AUD/USD and NZD/USD) or negatively correlated (tend to move in opposite directions, like EUR/USD and USD/CHF). A Forex correlation hedging EA identifies these relationships and uses them to hedge. For example, if you are long EUR/USD and want to hedge, an EA might buy USD/CHF (a negatively correlated pair). If EUR/USD falls, USD/CHF is likely to rise, offsetting some of the loss. The effectiveness of this strategy depends on the stability of the correlation, which can change over time and under different market conditions. Traders can find currency correlation data from various financial websites; for example, OANDA provides tools and analysis on currency correlations (Source: OANDA Currency Correlation). These tools often show correlation coefficients, indicating the strength and direction of the relationship.
Understanding Hedging Grid EA Strategy
A Hedging Grid EA strategy combines elements of hedging with grid trading. Grid trading involves placing a series of buy and sell orders at predefined price intervals above and below the current market price. A Hedging Grid EA might initiate a hedge if the market moves against an initial grid position, and then potentially add further grid layers to manage the situation.
For instance, if an initial buy order is hit and the market falls, the EA might place a sell order (a hedge) at a certain point. If the market continues to fall, it might add more buy orders at lower levels (averaging down) while potentially managing the sell hedge or even adding to it. This is an advanced and often very high-risk strategy. While it can look appealing by showing many small winning trades, a strong, sustained market trend against the overall grid structure can lead to rapid and significant drawdowns, potentially wiping out an account. The complexity of managing multiple open positions, hedges, and grid levels automatically is immense, and the risk of catastrophic loss is a serious concern with many Hedging Grid EA strategies.
Other Advanced Hedging Approaches
Beyond direct and correlation hedging, some EAs might attempt more sophisticated techniques, though these are less common in off-the-shelf retail EAs due to their complexity:
- Options Hedging: While Forex options are not as common in the retail spot Forex world as they are in other markets, they can theoretically be used for hedging. An EA would need access to trade options and would buy put or call options to protect an existing spot position. This is generally more suited for institutional or highly advanced traders.
- Basket Hedging: This involves creating a “basket” of multiple currency pairs. If the overall basket shows a loss beyond a certain threshold, the EA might hedge some or all of the constituent pairs, or hedge the entire basket using a correlated instrument (like a currency index future, if accessible). This strategy requires careful construction and management of the basket.
- Proxy Hedging: Similar to correlation hedging but may use other financial instruments like commodities or indices that are believed to have a reliable inverse correlation with a specific currency or currency pair under certain economic conditions. For example, using gold (XAU/USD) to hedge a USD position.
These advanced approaches often require significant capital, deep market understanding, and access to diverse trading instruments, putting them beyond the typical scope of many retail Forex traders and standard MT4/MT5 hedging EAs.
The Primary Goal: Capital Protection and Risk Mitigation with Hedging EAs
Many traders are drawn to Hedging EAs with the primary hope of safeguarding their trading capital and mitigating the inherent risks of Forex trading. While these tools are designed with risk management in mind, their effectiveness and limitations must be clearly understood. The idea of capital protection Forex strategies is appealing, but reality is often more nuanced.
Can Hedging EAs Truly Protect Your Capital?
Hedging EAs aim to protect your capital by neutralizing the risk of further loss on an open trade, but this protection is not absolute or guaranteed. When a hedge is placed, it locks in the current floating loss (or profit) for that specific trade. In this sense, it prevents that particular trade from losing more money due to adverse price movement while the hedge is active.
However, capital protection is a broader concept. While a hedge can stop a single trade’s loss from escalating, the overall capital can still be at risk due to several factors:
- Cost of Hedging: Swaps and spreads consume capital over time.
- Unhedging Risk: Incorrectly timing the removal of the hedge can lead to new losses or missed profit opportunities.
- Strategy Failure: If the underlying logic of the EA for managing the hedged scenario is flawed, it can lead to larger problems.
- Broker Execution: Slippage or inability to execute at desired prices can affect hedge effectiveness.
Therefore, while a Forex risk management EA using hedging can be a component of a capital protection strategy, it’s not a foolproof shield. It primarily transforms the immediate risk into a more manageable, albeit potentially costly, state.
How Do Hedging EAs Mitigate Trading Risks?
Hedging EAs mitigate trading risks primarily by creating an offsetting position that reduces your net exposure to market movements on a particular trade. If you have a buy trade and the market turns against you, a sell hedge neutralizes this exposure, meaning further downward movement doesn’t increase the loss on that hedged set of trades (ignoring costs).
This can be particularly useful for:
- Reducing Impact of Sudden Volatility: During unexpected news events, a hedge can quickly cap losses.
- Potential Drawdown Control EA Functionality: By preventing a losing trade from deteriorating further, it can help manage drawdown on that specific trade. However, overall account drawdown control is more complex and depends on the entire portfolio of trades and risk management settings.
- Buying Time for Reassessment: A hedge provides a trader or the EA’s logic with time to re-evaluate the market and decide on the next course of action without the pressure of mounting losses on that specific trade.
It’s crucial to remember that hedging doesn’t eliminate risk; it transforms it. The risk of price movement on the original trade is neutralized, but new risks related to managing the hedge, costs, and eventual unhedging emerge.
Hedging EA vs. Stop Loss: Which is Better for Risk Management?
Neither a Hedging EA nor a stop-loss order is universally “better” for risk management; they serve different functions and have distinct implications. A stop-loss order is an instruction to close a losing trade at a predetermined price level, thereby realizing the loss and freeing up margin. A hedging strategy, automated by an EA, keeps the original position open but adds an opposing one to neutralize its P&L movement.
Here’s a comparison:
- Stop Loss:
- Function: Exits a losing trade, realizes the loss.
- Pros: Simple, clearly defines maximum loss for that trade, frees up capital and margin.
- Cons: Can be triggered by temporary spikes (whipsaws), loss is definitive.
- Hedging EA:
- Function: Neutralizes an open trade’s exposure, keeps position open.
- Pros: Avoids realizing a loss immediately, offers a chance for the market to reverse and potentially recover the trade or even profit (if unhedged skillfully).
- Cons: Incurs ongoing costs (swaps, spreads), requires a strategy for unhedging (which can be complex and risky), ties up margin for two positions, may be restricted by brokers (e.g., FIFO).
Choosing between them, or how to combine them, depends on the trading strategy, market outlook, risk tolerance, and broker conditions. Some traders might use a “mental stop loss” level where they decide to activate a hedge. Others might prefer the finality of a stop loss. A safe hedging EA, if such a thing could be definitively claimed, would still require a robust plan for when and how to unwind the hedged positions.
Navigating the Potential and Pitfalls: Profitability and Risks
While the primary appeal of Hedging EAs often lies in risk mitigation, many users also hope for them to be profitable. It’s essential to approach this aspect with a balanced perspective, understanding both the potential avenues for profit and the significant, often understated, risks. The idea of a “profitable hedging EA” is enticing, but requires careful scrutiny.
Are Profitable Hedging EAs a Realistic Expectation?
Profitability with Hedging EAs is possible, but it’s complex, not guaranteed, and often misunderstood. A simple, perfectly hedged position (e.g., 1 lot buy EUR/USD and 1 lot sell EUR/USD) will not generate profit from price movement alone; its value remains static. Profit from a hedged scenario typically arises from skillfully unhedging—closing one leg of the hedge at a favorable moment and allowing the other to run into profit, or closing both with a net gain.
Some EAs might aim for profit by:
- Exploiting Carry Trade (Positive Swaps): If hedging creates a net positive swap, holding the position can generate small profits over time, but this is often marginal and sensitive to interest rate changes.
- Sophisticated Unhedging Algorithms: The EA attempts to identify optimal points to remove one or both sides of the hedge based on technical indicators or price action.
- Grid/Martingale Elements: Unfortunately, many EAs marketed as “profitable hedging EAs” secretly or openly incorporate high-risk strategies like martingale (doubling down on losing trades) or aggressive grid systems alongside hedging. These can show periods of profit but carry a very high risk of substantial loss. The “hedging” aspect might then be used to manage the drawdown of these risky core strategies, but it doesn’t eliminate their inherent danger.
A realistic expectation is that a true hedging strategy is more about managing risk and navigating difficult market conditions than it is about direct profit generation from the hedge itself. Any profit usually comes from the subsequent management of the hedged state.
What Are the Common Risks Associated with Forex Hedging EAs?
The common risks associated with Forex Hedging EAs include ongoing costs like swaps and spreads, the complexity of managing and exiting hedged positions, broker-specific restrictions on hedging, and the potential for hidden high-risk strategies within the EA. These can turn a perceived safety net into a financial trap if not fully understood.
Let’s break down these risks:
- Swap/Rollover Costs: Holding hedged positions overnight incurs swap fees. If these are negative (which is common for at least one side of a currency pair), they can accumulate significantly over time, eroding capital even if the price itself isn’t moving against you. For example, “Forex swap rates, also known as rollover rates, represent the interest rate differential between the two currencies in a pair. Traders either earn or pay this interest when holding a position overnight.” (Source: Investopedia, Forex Swap).
- Spread Impact: Every trade involves a spread (the difference between buy and sell price). Opening a hedge means paying the spread on a new position. When unhedging, spreads can again impact profitability, especially if they widen during volatile market conditions or news releases.
- Complexity of Unhedging: This is perhaps the most critical risk. Deciding when and how to remove the hedge (i.e., close one or both positions) is a strategic decision that can determine profit or loss. Poor unhedging can lock in losses or even create new ones.
- Broker Restrictions & Execution:
- FIFO Rule: As mentioned, US brokers must adhere to FIFO, preventing true direct hedging. (Source: National Futures Association, NFA Manual – NFA Compliance Rule 2-43(b)).
- Margin Requirements: Hedging involves two open positions, which can tie up significant margin, even if some brokers offer margin relief for hedged trades.
- Slippage: During fast markets, the price at which a hedge is executed might differ from the intended price, affecting its effectiveness.
- Over-reliance on Automation and “Set and Forget” Mentality: Believing an EA will perfectly manage all scenarios without oversight is dangerous. Market conditions change, and EAs can encounter situations their programming isn’t designed for.
- Hidden Grid/Martingale Elements: This is a major concern. Many commercial Hedging EAs use these high-risk techniques to show apparent profitability, but they can lead to catastrophic losses. Always demand transparency in an EA’s core strategy.
- False Sense of Security: Hedging can make traders feel “safe” because the immediate loss isn’t growing. This can lead to complacency and holding onto fundamentally bad positions for too long, racking up costs.
How Can Drawdown Control be Achieved with Hedging EAs?
Drawdown control with Hedging EAs can be achieved by temporarily halting the increase in loss on a specific trade or set of trades by neutralizing its market exposure, but this requires a well-defined strategy for managing the hedge itself. The EA aims to prevent a losing position from deteriorating further while the hedge is active.
However, true drawdown control at the account level is more comprehensive. While a hedge might stop one trade from contributing more to drawdown, other open trades, or the costs associated with the hedge (swaps), can still impact overall equity. A Drawdown Control EA that uses hedging effectively would need sophisticated logic not just to initiate the hedge, but also to:
- Manage the hedged positions to minimize costs.
- Identify opportune moments to unwind the hedge, ideally in a way that reduces the initial loss or even turns a profit.
- Integrate with overall account risk parameters (e.g., maximum allowable drawdown before ceasing all activity).
It’s important to note that if a Hedging EA frequently resorts to hedging, it might indicate flaws in the primary trade entry strategy. Effective drawdown control starts with sound initial trade selection and risk management, with hedging as a potential tactical tool rather than a constant necessity.
Practical Considerations for Using a Hedging EA
Successfully incorporating a Hedging EA into your trading approach requires more than just installing it. There are several practical aspects to consider, from selecting the right EA and understanding its settings to choosing appropriate currency pairs and ensuring platform compatibility. These considerations are key for anyone looking to use an Expert Advisor for hedging.
What Should Beginners Look for in a Hedging EA?
Beginners looking for a Hedging EA should prioritize transparency in its strategy, verifiable backtest results (while understanding their limitations), clear documentation, and access to reliable customer support. It’s crucial to avoid “black box” systems where the underlying logic is unknown.
Key aspects include:
- Clear Strategy Explanation: You should understand how the EA decides to hedge and, more importantly, how it plans to unhedge. Is it direct hedging, correlation, or something else?
- Avoidance of Risky Elements: Be extremely wary of EAs that openly or subtly use martingale, aggressive grid systems, or excessive averaging down as their core profit drivers, with hedging merely as a damage control mechanism.
- User-Configurable Risk Settings: The EA should allow you to define key risk parameters, such as when a hedge is triggered (e.g., pips in loss, percentage of equity).
- Verified Performance Records (with caution): Look for long-term track records on real accounts (e.g., via Myfxbook), but be aware that past performance is not indicative of future results. Understand the drawdown figures.
- Independent Reviews and Community Feedback: See what other users are saying, but filter out overly hyped or biased reviews.
- Focus on Risk Management Features: Prioritize EAs that clearly articulate their risk management protocols over those making extravagant profit claims. A “safe hedging EA” (a relative term) would emphasize capital preservation.
Key Hedging EA Settings Explained (General Overview)
Common Hedging EA settings typically include parameters for lot sizing, the conditions under which a hedge is initiated, and the logic for eventually removing or managing the hedged positions. Understanding these settings is crucial for tailoring the EA to your risk tolerance and trading plan.
General settings often found:
- Lot Sizing for Hedge: Will the hedge trade be the same size as the original, smaller, or larger? Same size provides a full hedge.
- Hedge Trigger Mechanism:
- Pips in Loss: Hedge after the original trade is X pips in negative territory.
- Equity Drop Percentage: Hedge if account equity drops by Y%.
- Specific Indicator Signal: Hedge if a certain technical indicator gives an opposing signal.
- Unhedging Logic (The Most Complex Part):
- Target Profit/Loss for the Hedged Pair: Close both trades when their combined P&L reaches a certain level.
- Market Reversal Signals: Remove one leg of the hedge if the market shows signs of reversing in favor of the original trade.
- Time-Based Exit: Close hedged positions after a certain period.
- Maximum Spread & Slippage: Settings to prevent the EA from trading if market conditions are too unfavorable (e.g., spreads are too wide).
- Magic Number: An identifier to ensure the EA only manages its own trades.
The specific Hedging EA settings will vary widely between different products. It is vital to thoroughly read the EA’s manual and understand each parameter before deploying it, even on a demo account.
Choosing the Right Currency Pairs for Hedging EAs
The choice of currency pairs for a Hedging EA depends significantly on the specific hedging strategy it employs. For direct hedging, any currency pair can be used. For correlation hedging, selecting pairs with historically stable and strong correlations is key.
- Direct Hedging: If the EA uses direct hedging (buying and selling the same pair, e.g., EUR/USD), then the choice of pair is based on your general trading preferences (volatility, spread, etc.). Major pairs like EUR/USD, GBP/USD, USD/JPY are common due to their liquidity and tighter spreads.
- Currency Pair Correlation Hedging EA: If the EA uses correlation hedging, you need to identify pairs that are either:
- Positively Correlated: E.g., AUD/USD and NZD/USD. If you are long one, you might short the other to hedge (though this specific example would be counter-intuitive for a simple hedge; more often, you’d take similar directional trades if expecting both to rise/fall together as part of a broader strategy, and hedge one if it moves adversely). A more common correlation hedge example: if long EUR/USD, and anticipating a broad USD strengthening that would hurt this trade, one might also short AUD/USD if both EUR and AUD are expected to weaken against USD.
- Negatively Correlated: E.g., EUR/USD and USD/CHF. If you are long EUR/USD, you might also go long USD/CHF as a hedge. If EUR/USD falls, USD/CHF tends to rise.
Reliable currency correlation data is essential. Many financial websites and trading platforms offer tools to view these correlations, which can change over time. For instance, “Myfxbook offers a currency correlation tool that traders can use to understand these relationships” (Source: Myfxbook Correlation Tool).
Importance of MT4/MT5 Compatibility for Hedging EAs
Most retail Forex Expert Advisors, including Hedging EAs, are developed for the MetaTrader 4 (MT4) or MetaTrader 5 (MT5) platforms. Therefore, ensuring compatibility is crucial: the EA must be designed for the specific platform version your broker provides.
- Platform Dominance: MT4 has historically been the most popular platform for EA trading, with a vast library of available robots. MT5 is newer and offers more advanced features, with a growing number of EAs being developed for it. An MT4 Hedging EA will not work on MT5, and vice versa, without being specifically coded or ported for that platform.
- Broker Support: Your Forex broker must support the platform for which the EA is designed. Most brokers offer MT4, and many now also support MT5.
- EA Installation: Correct installation of the EA files into the appropriate folders within the MT4/MT5 terminal is necessary for it to function.
- Backtesting Environment: These platforms also provide strategy testers for backtesting EAs, which is an important step (though not a guarantee of future success) before live trading. A Hedging EA for MT4 or an MT5 Hedging EA needs to be tested within its native environment.
Always verify an EA’s platform compatibility before purchasing or attempting to use it.
Final Thoughts on Hedging EAs
Hedging Expert Advisors represent a sophisticated tool in a Forex trader’s arsenal, primarily aimed at managing risk by automating the process of opening counter-positions. We’ve explored their mechanics, from direct hedging on the same currency pair to more complex correlation strategies, and highlighted their intended role in capital protection and risk mitigation. The allure of automated hedging strategies, especially for those with limited time, is understandable.
However, it is paramount to remember that Hedging EAs are not a “set and forget” solution to profitability or a guaranteed shield against losses. Their effectiveness is deeply intertwined with the soundness of their underlying algorithms, the crucial (and complex) process of unhedging, the associated costs like swaps and spreads, and the specific rules imposed by brokers. The term “Profitable Hedging EA” should be approached with extreme caution, as true profitability often comes from skillful management of the hedged state or, concerningly, from underlying high-risk strategies like martingale or aggressive grids that some EAs might employ. The dream of a “safe hedging EA” needs to be tempered by the reality that all trading involves risk.
Ultimately, a Hedging EA is a tool, and like any tool, its utility depends on the user’s understanding and skill. Focus on thoroughly comprehending any EA’s strategy, rigorously testing it (ideally on a demo account first), being acutely aware of all potential costs and risks, and never investing more than you can afford to lose. Education and due diligence are your best allies in navigating the complexities of automated trading systems.
Important Risk Warning
The content provided in this article is for educational and informational purposes only and should not be construed as financial or investment advice. Forex trading, including trading with Expert Advisors (EAs) like Hedging EAs, involves a very high level of risk and is not suitable for all investors. There is a substantial risk of losing all of your invested capital.
Past performance of any trading system or methodology, including EAs, is not indicative of future results. You should carefully consider your investment objectives, level of experience, and risk appetite before making any trading decisions. Do not trade with borrowed money or money you cannot afford to lose.
EaOnWay.com does not provide investment advice, nor does it sell or endorse any specific Forex EAs. The information presented is intended to help readers understand the Forex EA niche, including potential risks and operational aspects. Always conduct thorough due diligence and seek advice from an independent financial advisor if you are unsure about the risks involved.
-
Forex EA: A Beginner’s Guide To Low-Risk Systems
-

No DLL EA: Security, Portability, And Trust Benefits in Forex Trading
-

The Advantage of Forex EAs with Source Code: Unlocking Customization, Transparency, and Learning
-

Prop Firm Challenges: Using EAs For Success Guide
-
Verified EA Performance: Track Records And Audits Explained
-
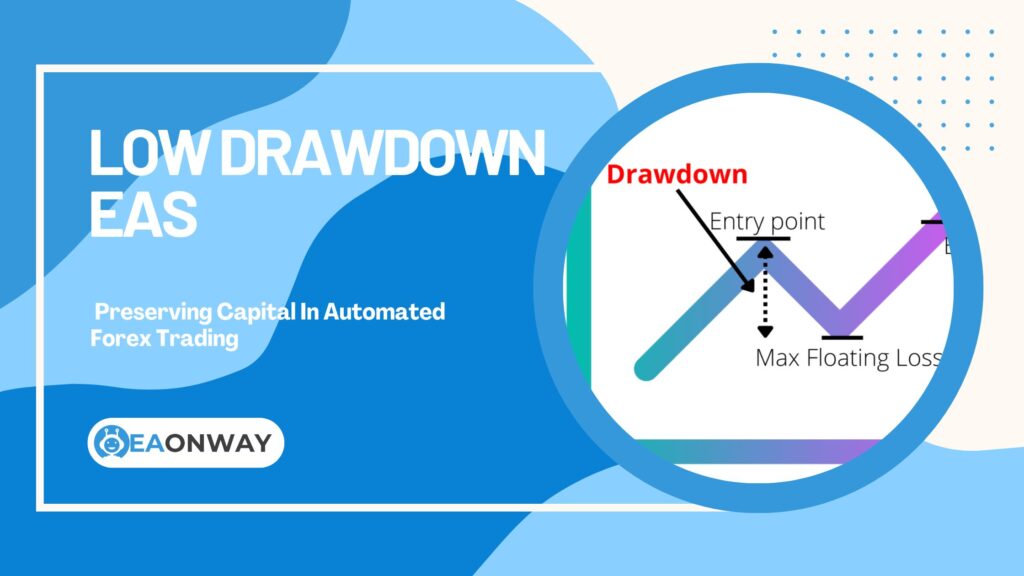
Low Drawdown EAs: Preserving Capital In Automated Forex Trading
-
Forex EA Secrets: Maximizing Major Pair Performance
-
Automated Index Trading: Unlocking Strategies With Expert Advisors
-

Gold Trading EAs Uncovered: Automating Your XAUUSD Strategy
-

USDJPY Expert Advisor: Mastering Automated Trading Strategies for a Unique Currency Pair
-
GBPUSD Automated Trading: Strategies, Volatility, And EA Best Practices
-
Trading EURUSD with Expert Advisors: A Comprehensive Guide to Automating the World’s Most Popular Pair